
If you follow these step-by-step all-grain brewing instructions, brewing your first professionally-made beer will be way easier than you ever thought it could be.
So you’re ready to gain full control over the brewing process and start brewing at home like a pro? Awesome.
All-grain brewing gives you complete control over the look, mouthfeel, taste, and strength of your creation. And it’s a lot easier than you think.
If you have any experience with brewing at all, you probably know half of the process already.
Here is a basic rundown to get you started. It isn’t the Encyclopedia Beertannica, but it’s enough to help you make that first conversation piece you’ve been dying to use at work.
What is All-Grain Brewing?
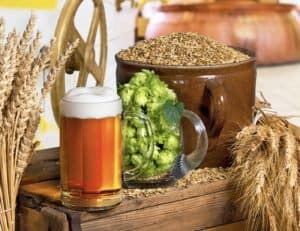 A delicious beer is a full out assault on your palate (and brain after a few too many), but comes down to only 4 ingredients:
- Grains
- Water
- Yeast
- Hops
Grains are used to acquire fermentable sugar that gives the beer its distinctive flavors. In all-grain brewing, you acquire the starches (that are converted to sugar) from mashing grains and converting them to use in your brew.
If you’re into brewing, you’re probably already familiar with extract brewing. It’s when you use concentrated powders for syrups made by malting companies as sugar for your brew.
It essentially allows you to skip the time-consuming process of mashing the grains yourself and speeds up the brewing process.
Think of all-grain like making a full meal from scratch rather than using pre-packaged ingredients or eating ready-made meals.
Extract vs. All-Grain Brewing
 Extract Brewing
Pros
- Smaller upfront investment
- Easier process
- Some room for errors
Cons
- Higher cost of ingredients
- You’re limited to the flavor of the extract
 All-Grain Brewing
Pros
- Full creative control
- Savings on ingredients over the long run
Cons
- More time and money invested
There’s no right or wrong way. You can make delicious beer with either method. It all comes down to your skill, budget, and goals.
OK, since you found this article, you must want to learn how to all-grain brew. Let’s get into the necessary equipment:
What Equipment Do You Need?
Myth: All-grain home brewing requires a lot of expensive equipment.
Fact: It requires more equipment than extract brewing but not that much.
 You know that friend who’s a beer snob and brags about all the equipment he uses to make his “Winter Special”? We’ve all got one. Thing is, most brewers exaggerate how much equipment is needed.
Here are the basics you need for the traditional “3-vessel” brewing method:
- Boiling Kettle (8 gallons or larger): Pretty self-explanatory. The first step in brewing is to boil some water, and, depending on how much beer you want to make (we’ll cover the formula down below), you might need a lot of water. Go big or go broke here.
- Mash Tun: This is used to mix the heated water and the grains. Get one that comes with a perforated, stainless steel dome at the bottom called a “false bottom”. This helps separate the water from the grain
- Hot Liquor Tank: No, you aren’t heating up bottom shelf liquor to enjoy while brewing. Liquor refers to hot water treated for brewing. This is used for sparging or rinsing the mash with hot water.
- Thermometer
- Mash Paddle (for stirring)
- Propane Burner (preferably 2 burners with 50,000 BTU capacity)
- Heat-Resistant Tubing
“Using all-grain brewing can be like driving a car…Using it to go from point A to point B without much thought about it. Or you can know what’s under the hood – knowing that by checking the oil, changing the spark plugs and listening for clanking noises that there are things you can do to make that car work more efficiently for you.”
– John Palmer, Brewer
Optional Equipment
 These pieces of equipment aren’t necessary but definitely make your life easier:
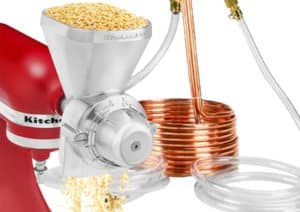
- Wort Chiller: This can cut a lot of time off the brewing process. You should cool your wort down to 80 degrees as quickly as possible after the boil. A chiller does it for you in the fraction of the time of an ice bath.
- Grain Mill: Purchasing unmilled grain in bulk is a great way to cut costs. Also, milling your grains right before you brew increases freshness.
- A Pump: Do you have nightmares of the worst happening when picking up a hot kettle? So do we. Use a pump to transfer the water!
The 3 Phases to Make All-Grain Beer
 Total Output: 5 Gallons.
This is where the magic happens. All-grain brewing basically happens in 3 phases:
- Mashing
- Sparging
- Boiling
First, you need to get the right amount of water. As a rule of thumb, you need 1 quart (¼ gallon) for every 1 pound of grain. Heat the water up to between 150-175 degrees (your “strike temperature”) depending on your recipe.
As a rule of thumb, you want your strike water to be roughly 10-15 ℉ hotter than your mash temperature.
Now it’s time to start mashing:
Phase 1: Mashing
Mashing is the process of mixing your strike water and grains together.
 Pour one gallon of strike water into the mash tun
- Begin pouring in the grains, mixing steadily as you go (alternate between water and grains if you’re working alone)
- Take the mash’s temperature: The ideal temperature rate here is between 148-158 ℉.
- If it’s too hot, keep stirring. If it’s too cool, add some boiling water
- Prepare some coffee or tea (or get one of your home-brewed beers out)
- Wait 60-75 minutes (while this is happening, begin heating the sparge water to 175 ℉ and transfer it to the hot liquor tank)
Pro Tip: Test the wort using iodine. Put a tad on a white surface and add a drop of iodine—if it turns black, let it sit longer. That means starches still exist.
Phase 2: Sparging
The next step is getting the wort out of the mash tun and sparging it in the brew pot. But first, you’ve got to collect some wort and recirculate it in the mash tun. Recirculating or “the vorlauf process” help clear the wort of particles. [1]
- Place your pitcher below the mash tun
- Attach the heat-resistant tubing to the spigot
- Place the other end into the pitcher
- Crack open the spigot just enough to have a steady flow
- You will see tiny bits of grain in the wort (it will look cloudy).
- Close the spigot after collecting 1 quart of wort
 Pour the wort over the mash carefully along the side of the mash tun.
Repeat this until the wort is clear. Now it’s time to start sparging. The sparge phase is when you rinse the mash with hot water to rinse residual sugars through.
We recommend using a 3-tiered system so that gravity can do all of the work for you. Place two platform next to each other, one taller than the next.
Put the hot liquor tank on the taller platform, the mash tun on the shorter platform, and the boil kettle on the floor. You can use tables or any sort of platform you can find.
Pro Tip: Optimal sugar extraction occurs at the rate of about 1 quart/minute. This is when the rate of water going into the mash equals the rate of wort coming out of the mash tun.
Open the spigots and let the water flow, keeping an eye on everything to make sure the grain bed doesn’t go dry or the hot liquor tank doesn’t get stuck.
If you need to do it by hand, here’s how:
- Slowly add the sparge water to the mash tun using your pitcher
- Let the wort flow out of the mash tun into the boil kettle
- Make sure to keep the water level above the grain bed
- Do this until you’ve collected an adequate amount of wort (for 5 gallons, you need about 6 gallons of wort)
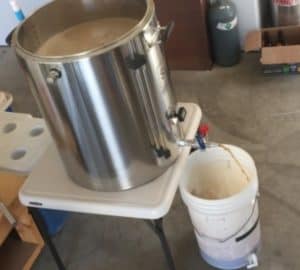
Phase 3: Boiling
 When boiling, it’s important to remember that evaporation will occur, so that you will need a much larger kettle than extract brewing. For example, if you want to boil 5 gallons, you’ll need about a 7-gallon kettle.
With all-grain brewing, you don’t add water after chilling, meaning you have to boil the entire volume at once. This doubles your thermal mass or more.
A normal kitchen stove can’t handle this load, so this is where the propane burner comes into play.
Boil for roughly 60-120 minutes, adding hops along the way per your recipe.
Remove from the heat and begin the cooling process. A 5 gallon batch of hot wort weighs roughly 45 pounds. Have fun carrying that to the bathtub. Get a wort chiller and avoid the hazard.
In addition, different temperatures when boiling wort also impacts the stabilizing properties of beer foam. [2]
That’s it! From here, you can just follow the extract brewing process.
What Are You Waiting For?
Sure, you could just a pre-made packet and skip all of the sweat and tears of making your own wort, but it’s worth it for the artistic license and delicious flavors.
All-grain brewing isn’t as hard or complicated as most make it seem. Just follow these step-by-step instructions, and you’ll be sipping a delicious homemade beer in no time (and bragging to everyone at work).
Alternatively, if you’re too lazy and want to sip on delicious beer now, you should join a beer of the month club. We’ve written an article on how you can try a wide variety of craft beers delivered to your door monthly.

References
- Matt Waldron, THE VORLAUF EFFECT – PT. 1: DOES IT MAKE A DIFFERENCE? | EXBEERIMENT RESULTS!, retrieved from https://brulosophy.com/2016/02/22/the-vorlauf-effect-pt-1-does-it-make-a-difference-exbeeriment-results/
- Sandra N. E. Van Nierop, David E. Evans, Barry C. Axcell, Ian C. Cantrell, Marina Rautenbach, retrieved from https://pubs.acs.org/doi/abs/10.1021/jf035125c?src=recsys&journalCode=jafcau