Want to learn how to malt your own barley? It’s easy. All you need is barley, some water, and a bit of rewarding work (plus a lot of patience).
The problem is that it can be a bit confusing for beginners, and it doesn’t help that most of the material we found online was either overly detailed and confusing or flat out wrong.
This step-by-step guide will teach how to malt your first batch for brewing in plain English.
Making beer is pretty easy. Making malt? Even easier.
It requires minimal equipment and in just 3 steps you’ll have the initial ingredient for high-quality beer.
The 3 steps are:
- Steeping: Steeping is the process of activating the barley, causing it to germinate. Think of it as the awakening of the kernel.
- Germination: This is where the enzymes necessary for beer are developed within the kernel. These enzymes eventually break down the starch during the mashing process.
- Drying: This is when the barley is dried. The enzymes have been activated but not yet used by the kernel. Drying them out freezes the process and preserves the enzymes for beer making. You will need either a food dehydrator (hold on, we’ll explain further down) or an oven.
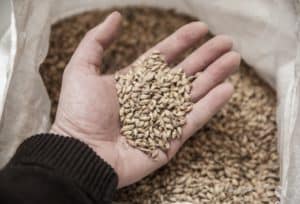
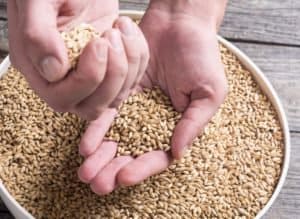
Go grab yourself some high-quality barley from a local farmer and let’s get to it.
The Basics
First, let’s cover some of the basics of making your first batch of malt at home.
What is Malted Barley?
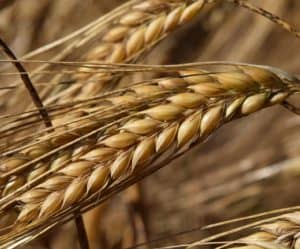 Malted barley, or just plain “malt”, is the most basic ingredient of beer (read here).
Basically, it’s barley that has germinated in water to activate enzymes that will convert starches to fermentable sugars during the brewing process.
These days, most microbrewers and home enthusiasts buy malted grains to save time. But not you. You’re going old school to get the truest home brewing experience.
Aside from getting the full experience of brewing, you’ll also save money. A 50 lb bag of barley usually costs $10 or less.
“Malted barley, or malt, is the brewer’s preferred grain for making beer. In it’s most basic form, it is barley that has been allowed to germinate by soaking the grain in water. This prepares the starches to be converted into fermentable sugars.”
– Bryce Eddings, Brewer
Equipment Needed
The great thing about malting barley at home is you really don’t need much equipment. Sure, you could get some hi-tech stuff and go through a more detailed process, but for a basic batch let’s just keep things simple.
The only thing you need is a bucket (seriously). However, your life will be a lot easier if you have:
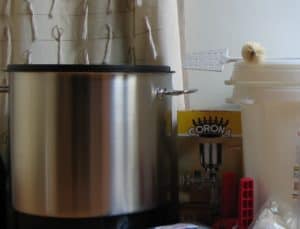
- A Mash Tun: This is a bucket with a spigot that lets you drain water easily rather than using a strainer.
- A Food Dehydrator or an Oven: A food dehydrator is a nifty contraption that drys food for storage or later use with a combo of heat and hot air. An oven will do if you don’t have one.
- A Spray Bottle: This is for hydrating the barley during the germination process.
If you’re already brewing beer, then you’ve probably got them lying around already.
Let’s malt some barley!
Process Length: About a week.
Note: Make sure to use whole raw barley (not hulled or pearled).
1. Steeping
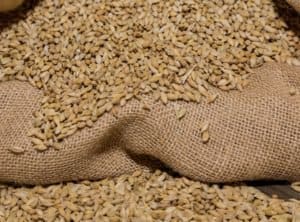
First, give your barley a good bath. If it’s your first time, start with a small amount. 2 pounds ought to do. [1]

- Pour the barley into your bucket. Don’t fill it more than halfway.
- Pour enough room temperature water into the bucket to cover the barley by about 1 inch.
- Let it sit for about 8 hours in a cool place (50-60 degrees). A basement or garage will do.
- You’ll notice some dirt and other nasty stuff float to the top. Just remove it with your hand.
- Drain the water from the bucket. If you’re using a mash tun, open the spigot. If not, pour your barley into a strainer.
- Wash the bucket thoroughly.
That was pretty easy, right? Now it’s time to let it air out a bit.
WARNING: DON’T FORGET THIS STEP! If the barley doesn’t get enough air, it will die.
Place the barley in the bucket for about 8 hours.
Since you just had so much fun steeping your grains, it’s time to do it again. No seriously, if you don’t soak it again, you won’t activate enough enzymes.
Repeat these steps for the second soak.
Now it’s time to examine for “chits”. Chits are roots that protrude from the kernels. You’re ready for step 2 when the vast majority (like 80% or more) have “chitted”.
Pros have fancy equipment and mathematical formulas for this, but since we’re just starting, the eye test will do.
Take a bunch of kernels out and look for small white roots. If most of them have chits, you’re all good.
2. Germinating
Germinating the barley makes it more open to the fermentation process later on down the line (can you taste the delicious homebrew yet?). [2]
Again, there are some fancy methods for doing this but we’re going to stick to the basics.
- Transfer the barley to baking sheets and spread them out.
- Place the baking sheet inside a garbage bag.
You need to store the barley in a cool dry place. Again, a basement or garage is perfect. If it’s too hot or moist, mold will destroy your batch. If it’s too cold, it won’t germinate.
Now it’s time to become a real maltster.
- Mist the barley with your spray bottle lightly.
- Spread the grain around with your hands
If you’re somewhere damp, this only needs to be about 3 times per day. The drier the environment, the more it needs to be done. In general, every 6-8 hours is fine.
New Term: Acrospire
The acrospire is the sprout inside the kernel that grows up the grain. Each time you flip the barley, take a few kernels out and cut them open. When the sprout inside is the size of the grain itself, your malt is ready for the next step.
This entire process takes 2-5 days depending on your conditions.
3. Drying (or “kilning”)
 Now it’s time to stop the germination process by drying the malt out.
Drying your malt is normally done in a kiln, a type of oven used for drying materials (like food or pottery). However, you probably don’t have one, so “kilning” is actually best done in a food dehydrator.
- Spread the malt evenly over the hydrator grid
- Dry on 120 ℉ for 6-8 hours or until the roots fall off
If you don’t have a food dehydrator, use an oven set to 125 ℉ or just dry them in the sun on a baking sheet. Make sure to bring them in at night to keep them out of the hands of predators.
How to Tell When Your Malt is Done Drying?
 Examine the kernels—if the roots fall off easily, then they’re dry enough. Shake em’ up in a strainer or do it by hand (we recommend doing this outside).
Once you remove the roots just, store them in an airtight container in your fridge or basement.
You’re done. Seriously.
Knowing how to malt barley opens you up to one of the most unique experiences in homebrewing. Sure, it’s a bit of work, but it’s really easy.
Now you are truly the master of your own home craft brew. Enjoy bragging to all of your coworkers.