
Everyone has their own drink of choice whether it be liquor, beer, or something in between. An emerging preference of many individuals from across the globe is hard apple cider, offering the consumer a range of dry and sweet beverages, which each alters in appearance, color and taste.
Enhancing the enjoyment of cider is the prospect of home brewing your own batch, tailoring your beverage to your personal taste as well as your own personal preferences.
Homebrewing may not traditionally have the best image. An impression of your granddad in his garden shed comes to mind, mixing up his DIY unscientific concoction which should probably have enlisted its personal warning omen.
However, today, home brewing is much more sophisticated with specialist equipment being readily available at economical prices with the product itself being highly coveted.

The Process of Making Your own Hard Apple Cider
We are going to guide you through the process of making your own cider at home, turning you into homebrewing professional and transforming your credibility in just a few simple steps.
Here is a summary of the process required to make your own cider at home:
- Prepare the apples
- Pulping and pressing
- Warm the juice for a period of time
- Siphon juice into a demijohn, then juice and use a bubbler to prevent bacteria.
- Leave the juice to warm and then siphon out the demijohn and mix in sugar. Voila!
Did you think it would be so easy?! You will soon be a connoisseur in making cider. We’ll go through the process in more detail soon, just after we cover some basics.
Cider vs Hard Cider
The word ‘cider’ can have a different meaning for different people, depending on where you come from. For example, in the U.S. the word ‘cider’ may generally refer to sweet cider which is simply unprocessed apple juice.
In the U.K., however, the word ‘cider’ may bring assumptions of alcoholic cider, sometimes referred to as hard cider. Here, we will be focusing on homebrewing hard cider – the alcoholic variety.
Hard cider actually has 4 different distinct types. Check out this article for more info: What are the Different Types of Hard Cider?
Ingredients Needed to Make Hard Apple Cider
The main ingredient you need when making your own hard cider is of course apples! Apples are already ripe for the growing cider market and the more apples you have, the more hard cider you can make. We will be using 20 pounds of apples in our recipe although you can adapt the quantity of ingredients to make the amount of hard cider you desire.
Apart from apples, what other ingredients do you need?
- Yeast – a teaspoon and a half is required for 20 pounds of apples. This is the ingredient which will turn your non-alcoholic, sweet cider into an alcoholic hard cider so skip this ingredient if you are producing the non-alcoholic variety.
- Sugar – three-quarters of an ounce is added at the end of the process to contribute to taste and fizz.
- Sodium Metabisulfite – a solution added to the bubbler to keep bacteria at bay.
- Vitamin B1 – two vitamin tablets, crushed.

Equipment Needed to Make Hard Cider
Below are the 10 pieces of equipment you’ll need for making hard cider, with the apple press included.
- Sharp knife – for quartering washed apples.
- Food processor – to pulp the apples.
- Apple press – to squash out the juice from the pulp.
- Fermentation bucket with lid – for storing the liquid during fermentation.
- Siphon – for siphoning the liquid.
- Demi-John – specialist container.
- Airlock with bung – to aid the fermenting process.
- Thermometer & hydrometer – for recording temperatures, ensuring the process goes well.
- Sterilizer – to keep bacteria at bay.
- Glass bottles and bottle caps with a bottle capper – adding a touch of class to a professional job!
Homemade Hard Apple Cider: Step by Step Guide
Now that we’ve covered some of the basics, as well as the equipment and necessary ingredients, it’s time to go over the necessary steps in crafting your homemade hard cider.
Step 1 – Prepare Your Apples
Knowing how to make cider from apples is important because this fruit is the most essential ingredient on this type of brew. While using cider apples would work best and provide the ultimate aficionado taste, any variants at all will work fine.
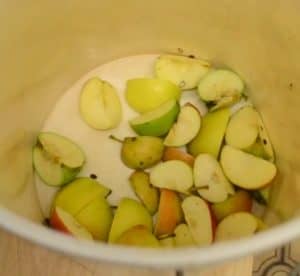
What is more important is that the apples are of a good quality and that any bruising or mild rot is amputated at the first step. Thoroughly wash it and then take a sharp knife and chop them into quarters.
Quartering your apples will ease the pulping and pressing processes later on. This process will make your hard cider guaranteed delicious.
Step 2 – Pulp Your Apples
Next, you need to create a pulp from your apples by placing it inside a food processor a few at a time. Repeat this process for all of your apples, collecting your pulp in a container.
Step 3 – Press Your Apples
Take your apple press and make sure it is well and truly secured to the ground. Securing your press is important as towards the end of the pressing process, the pulp will compact, and it will become very difficult to press!
In case the pulp begins to squirt out of the press due to the pressure, it may be best to cover the press in a muslin bag, making a hole in the bag and placing over the shaft followed by the press itself.
Fill the apple press to the top with pulp, placing a jug in a good position straight away as juice will start to run immediately during the process. Place the two semi-circle pieces of wood on the top of the pulp and then place the small blocks on top of the semi-circles.
Place the top of the shaft in the correct position and then turn the screw in position. The metal rod is then locked in place. Turn the metal rod gently yet purposefully, and as it turns it will squash the apple pulp down through the press, and the apple juice will begin to run out into the jug.
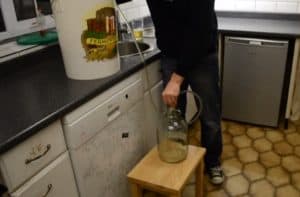
You may need more than one jug or container to catch the juice, just to ensure that there is no overflowing or spilling of the delicious juices. Keep squeezing until you can squeeze no more – you should be able to get a few pints of juice out of the pulp. Repeat the process until you have squeezed every last drop of your apple pulp.
Step 4 – Temperature Control
Place apple juice in a warm cupboard for 24 hours, aiming to raise and maintain the temperature of the juice up to 20 degrees, or 68 degrees Fahrenheit. Then add a teaspoon and a half of yeast, keeping the 20-degree temperature.
Take two vitamin B1 tablets, crushing the tablets between two teaspoons and turning the vitamins to powder. Add the powder to the liquid and give it a good stir.
Place the liquid in a warm cupboard again for another 24 hours and then transfer the liquid to a cupboard with a temperature of 18 degrees (64) for seven days.
Step 5 – Siphon the Liquid
Siphon the liquid in order to transfer it to a demi-john container, popping-in an airlock. Place sodium metabisulfite solution inside the bubbler to prevent any nasty bacteria from forming or developing in the cider.
Place the liquid in a warm cupboard until the yeast turns the sugar to alcohol. You will know that your hard cider has reached this point when the bubbles have ceased bubbling in the bubbler. Take a hydrometer reading over three consecutive days to ensure that this process is complete.
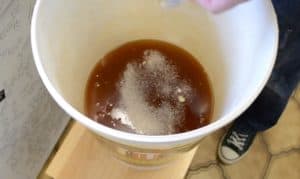
Placing a siphon into the top of demi-john container, transfer the hard cider into your bucket. Add three-quarters of an ounce of sugar at this point. Give it a stir and ensure it is completely mixed, contributing to both flavor and fizz!
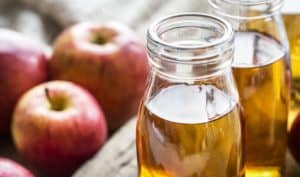
Step 6 – Bottle
Siphon the hard cider into bottles. Any type of bottle will suffice; it is purely your choice. Seal bottles with crown caps, using a crown capper to seal them professionally. Put the bottles in a warm place so that secondary fermentation can take place. Follow this up by concluding the process and placing the bottles somewhere cool for a final two weeks.

How to Make Hard Apple Cider without a Press
If you do not have an apple press when making cider at home, then you can either use a juicer (a masticating juicer) or a food processor – both will get the job done.
- Juicer – You don’t need to worry about coring or taking out the seeds – the juicer will handle this. When the pulp container gets full, squeeze the juice out of the pulp to get the remaining juice.
- Food processor – same thing as the juicer, you don’t need to core the apples. Just cut it into small pieces and put it into the food processor. You should now have apple mush. You’ll need to squeeze out the juice from the pulp.
- Hand Press – If you really don’t have both then why not try and press your apples the old fashioned way?! Hand-pressing apples is definitely hard work, although you will no doubt be able to release any pent-up frustrations as well as working on your upper body strength!
Extra Tips
- If you want to produce non-alcoholic sweet cider, skip the step where yeast is added. You can follow the remaining steps and produce a delicious cider which everyone can enjoy.
- The addition of sugar at the end of the process creates a fizz in your cider. Why not experiment and skip this step to produce a still variety of the beverage?
How to Make Hard Apple Cider Summary
We have shown you an easy step-by-step method which anyone can use to make your own cider.
You will benefit from purchasing the best equipment which you can then use over and over again, producing batches and batches of hard cider.
Why not experiment with different varieties of apples or a mixture of apple varieties? Perhaps join a Cider of the Month Club for inspiration?
Whatever customization you place on our step-by-step method, you are destined to create a delicious, homemade hard cider which will be envied by everyone around you!
Everyone has their favorite, whether it is liquor, spirits or beer or something in between!
An emerging preference of many individuals from across the globe is cider, offering the consumer a range of dry and sweet beverages, which each alters in appearance, color and taste.
Enhancing the enjoyment of cider is the prospect of home brewing your own batch, tailoring your beverage to your personal taste as well as your own personal preferences.
Homebrewing may not traditionally have the best image. An impression of your granddad in his garden shed comes to mind, mixing up his DIY unscientific concoction which should probably have enlisted its personal warning omen.
However, today home brewing is much more sophisticated with specialist equipment being readily available at economical prices with the product itself being highly coveted.
[toc]
The Process of Making Your Own Cider At Home
 We are going to guide you through the process of making your own cider at home, turning you into homebrewing professional and transforming your credibility in just a few simple steps.
Here is a summary of the process required to make your own cider at home:
- Prepare the apples
- Pulping and pressing
- Warm the juice for a period of time
- Siphon juice into a demijohn, then juice and use a bubbler to prevent bacteria.
- Leave the juice to warm and then siphon out the demijohn and mix in sugar. Voila!
Did you think it would be so easy?! You will soon be a connoisseur in making cider.
Cider vs. Hard Cider
 The word ‘cider’ can have a different meaning for different people, depending on where you come from.
For example, in the U.S. the word ‘cider’ may generally refer to sweet cider which is simply unprocessed apple juice.
In the U.K., however, the word ‘cider’ may bring assumptions of alcoholic cider, sometimes referred to as hard cider.
Here, we will be focusing on homebrewing hard cider – the alcoholic variety. [1]
Hard cider actually has 4 different distinct types. Check out this article for more info: What are the Different Types of Hard Cider?
However, if you wish to produce non-alcoholic sweet cider, then simply skip the step where yeast is added.
What Ingredients Are Needed to Make Cider?
 The main ingredient you need when making your own cider is of course apples!
Apples are already ripe for the growing cider market and the more apples you have, the more hard cider you can make.
We will be using 20 pounds of apples in our recipe although you can adapt the quantity of ingredients to make the amount of hard cider you desire. [2]
“The blend really dictates what we do as cider makers, so we’re really confined, but that’s where the creativity comes in. You can only do so much, so to make your own stamp, you have to work within those confines and really try to create something exciting for people,”
– Brian Rutzen, Brewmaster
Apart from apples, what other ingredients do you need?
- Yeast – a teaspoon and a half is required for 20 pounds of apples. This is the ingredient which will turn your non-alcoholic, sweet cider into an alcoholic hard cider so skip this ingredient if you are producing the non-alcoholic variety.
- Sugar – three-quarters of an ounce is added at the end of the process to contribute to taste and fizz.
- Sodium Metabisulfite – a solution added to the bubbler to keep bacteria at bay.
- Vitamin B1 – two vitamin tablets, crushed.
What Equipment do I Need?

- Sharp knife – for quartering washed apples.
- Food processor – to pulp the apples.
- Apple press – to squash out the juice from the pulp.
- Fermentation bucket with lid – for storing the liquid during fermentation.
- Siphon – for siphoning the liquid.
- Demi-John – specialist container.
- Airlock with bung – to aid the fermenting process.
- Thermometer & hydrometer – for recording temperatures, ensuring the process goes well.
- Sterilizer – to keep bacteria at bay.
- Glass bottles and bottle caps with a bottle capper – adding a touch of class to a professional job!
How to Make Apple Cider with a Press
Making your own hard cider at home may take around four weeks until the cider is at the stage where you can sit back and enjoy the fruits of your labor and show-off your hard graft to your family and friends! [3]
This DIY hard cider recipe will make you realize that the wait and the grind are well-worth it, enabling you to flourish in all your well-deserved glory.
Step 1 – Preparing Your Apples
 Knowing how to make cider from apples is important because this fruit is the most essential ingredient on this type of brew.
While using cider apples would work best and provide the ultimate aficionado taste, any variants at all will work fine.
What is more important is that the apples are of a good quality and that any bruising or mild rot is amputated at the first step.
Thoroughly wash it and then take a sharp knife and chop them into quarters.
Quartering your apples will ease the pulping and pressing processes later on. This process will make your hard cider guaranteed delicious.
Step 2 – Pulping Your Apples
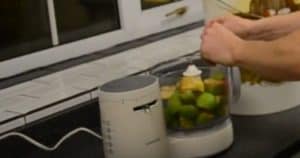 Next, you need to create a pulp from your apples by placing it inside a food processor a few at a time.
Repeat this process for all of your apples, collecting your pulp in a container.
Step 3 – Pressing Your Apples
 Take your apple press and make sure it is well and truly secured to the ground. Securing your press is important as towards the end of the pressing process, the pulp will compact, and it will become very difficult to press!
In case the pulp begins to squirt out of the press due to the pressure, it may be best to cover the press in a muslin bag, making a hole in the bag and placing over the shaft followed by the press itself.
Fill the apple press to the top with pulp, placing a jug in a good position straight away as juice will start to run immediately during the process. Place the two semi-circle pieces of wood on the top of the pulp and then place the small blocks on top of the semi-circles.
Place the top of the shaft in the correct position and then turn the screw in position. The metal rod is then locked in place.
 Turn the metal rod gently yet purposefully, and as it turns it will squash the apple pulp down through the press, and the apple juice will begin to run out into the jug.
You may need more than one jug or container to catch the juice, just to ensure that there is no overflowing or spilling of the delicious juices.
Keep squeezing until you can squeeze no more – you should be able to get a few pints of juice out of the pulp. Repeat the process until you have squeezed every last drop of your apple pulp.
Step 4 – The Correct Temperatures
 Place apple juice in a warm cupboard for 24 hours, aiming to raise and maintain the temperature of the juice up to 20 degrees. Then add a teaspoon and a half of yeast, keeping the 20-degree temperature.
Take two vitamin B1 tablets, crushing the tablets between two teaspoons and turning the vitamins to powder. Add the powder to the liquid and give it a good stir.
Place the liquid in a warm cupboard again for another 24 hours and then transfer the liquid to a cupboard with a temperature of 18 degrees for seven days.
Step 5 – Siphoning the Liquid
 Siphon the liquid in order to transfer it to a demi-john container, popping-in an airlock. Place sodium metabisulfite solution inside the bubbler to prevent any nasty bacteria from forming or developing in the cider.
Place the liquid in a warm cupboard until the yeast turns the sugar to alcohol. You will know that your hard cider has reached this point when the bubbles have ceased bubbling in the bubbler.
Take a hydrometer reading over three consecutive days to ensure that this process is complete. Placing a siphon into the top of demi-john container, transfer the hard cider into your bucket.
Add three-quarters of an ounce of sugar at this point. Give it a stir and ensure it is completely mixed, contributing to both flavor and fizz!
Step 6 – Bottling
 Siphon the hard cider into bottles. Any type of bottle will suffice; it is purely your choice.
Seal bottles with crown caps, using a crown capper to seal them professionally.
Put the bottles in a warm place so that secondary fermentation can take place.
Follow this up by concluding the process and placing the bottles somewhere cool for a final two weeks.
How to Make Cider at Home Without a Press
If you do not have an apple press when making cider at home, then you can either use a juicer (a masticating juicer) or a food processor – both will get the job done.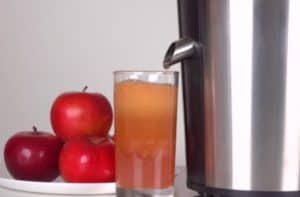
- Juicer – You don’t need to worry about coring or taking out the seeds – the juicer will handle this. When the pulp container gets full, squeeze the juice out of the pulp to get the remaining juice.
- Food processor – same thing as the juicer, you don’t need to core the apples. Just cut it into small pieces and put it into the food processor. You should now have apple mush. You’ll need to squeeze out the juice from the pulp.
If you really don’t have both then why not try and press your apples the old fashioned way?! Hand-pressing apples is definitely hard work, although you will no doubt be able to release any pent-up frustrations as well as working on your upper body strength!
Extra Tips
- If you want to produce non-alcoholic sweet cider, skip the step where yeast is added. You can follow the remaining steps and produce a delicious cider which everyone can enjoy.
- The addition of sugar at the end of the process creates a fizz in your cider. Why not experiment and skip this step to produce a still variety of the beverage?
Final Thoughts on Making Cider at Home
 We have shown you an easy step-by-step method which anyone can use to make your own cider.
You will benefit from purchasing the best equipment which you can then use over and over again, producing batches and batches of hard cider.
Why not experiment with different varieties of apples or a mixture of apple varieties? Perhaps join a Cider of the Month Club for inspiration?
Whatever customization you place on our step-by-step method, you are destined to create a delicious, homemade hard cider which will be envied by everyone around you!
References:
1. Jackie Swift, The Emerging Industry of Hard Cider, retrieved from https://research.cornell.edu/news-features/emerging-industry-hard-cider
2. Jane Robinson, Apple research ripe for growing cider market, retrieved from https://www.plant.uoguelph.ca/news/apple-research-ripe-growing-cider-market
3. Nathan Poell, How to Make Hard Cider, retrieved from https://www.motherearthnews.com/real-food/fermenting/how-to-make-hard-cider-zmaz07onzgoe